If you know your way around the PHP programming language, you’ve probably used PHP libraries to make your code simpler and easier to manage. Composer is a useful open-source tool that any developer can use to manage those dependencies and libraries. Many well-known frameworks, like Laravel and Drupal, have development processes that begin with installing Composer.
Here’s how to add Composer to your development environment on Windows, Linux, and macOS and how to deploy a Composer-based PHP application on a hosting platform like Kinsta’s.
What Is Composer?
Composer is responsible for managing libraries on a per-project basis. It can be installed directly in the project’s directory, or it can be installed globally and accessed from anywhere in the system. It allows you to declare the libraries on which the code depends. It also finds out the version of related packages that are needed and installs them for you.
The requirements of each project are declared in a JSON file (named composer.json), which allows Composer to evaluate which package version is the best match for an application dependency. This streamlines the development process, meaning a developer can devote more of their time to building and improving their core application.
Composer Installation Instructions
To work with Composer, you’ll need to install PHP on your system.
Depending on your setup, you have different options for installing Composer, each involving slightly different steps. The following sections explain how to install Composer on the following operating systems:
Installing Composer on Linux
Composer can be installed using the terminal in Linux. For this tutorial, you’ll use Ubuntu as an example. If you’re using a different Linux distribution, then follow the instructions for downloading Composer provided by that distribution’s website.
To install Composer on Ubuntu, first download Composer from its website:
php -r "copy('https://getcomposer.org/installer', 'composer-setup.php');"You can now proceed to install Composer either locally or globally on your system.
Run the following command for local installation:
php composer-setup.phpBy installing Composer locally, you can ensure that the PHP project is compatible with the version of Composer you have installed. This will help prevent compatibility issues and make sure that your PHP project is running smoothly on a hosting platform like Kinsta.
Alternatively, the following commands will install Composer globally, which allows the dependency manager to run anywhere in the system without specifying the full path:
php composer-setup.php --install-dir=/usr/local/bin --filename=composerAfter you’ve completed the installation using your chosen method, remove the installer from your computer using the following commands:
php -r "unlink('composer-setup.php');"Finally, run the following command in your terminal to test whether Composer has been installed successfully:
composerWhen you run Composer without any arguments, program help is displayed, starting something like this:
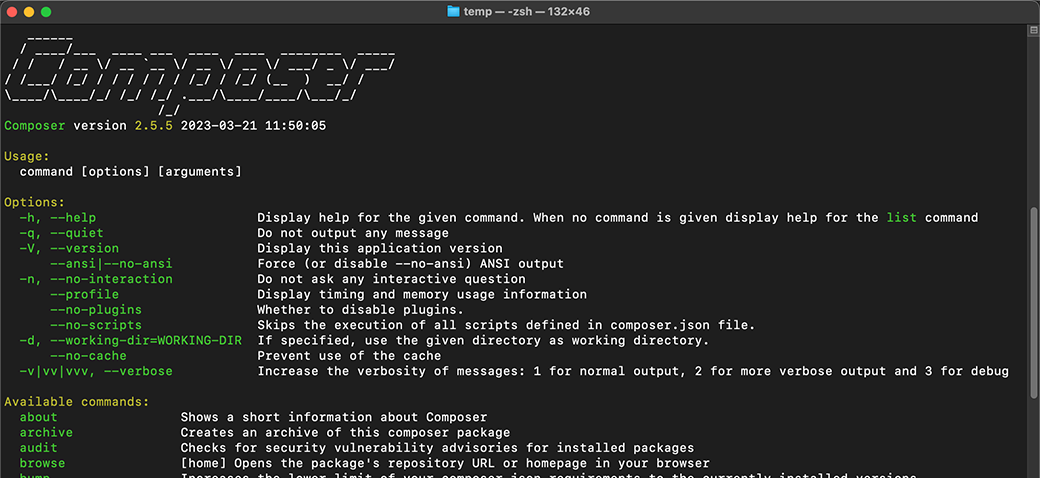
Installing Composer on Windows
Installing Compose on Windows is relatively straightforward. Open your browser and navigate to the Composer website, then click the Getting Started button.
In the table of contents, navigate to the Using the Installer section under the Installation – Windows heading.
Click the link for Composer-Setup.exe to download the installer:
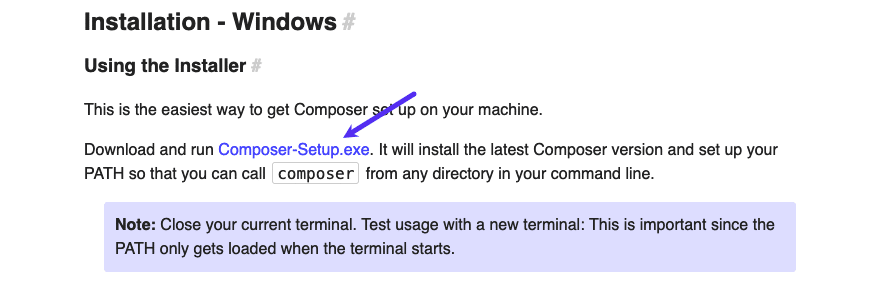
Run the installer and follow the instructions to install Composer. After the installation, you can verify that everything works by opening up your command prompt and typing the following:
composerYou should see a list of available Composer commands, which means that you’ve successfully installed Composer on Windows.
Installing Composer on macOS
You can install Composer on macOS by opening up the terminal and following the instructions below.
First, download the Composer installer:
sudo php -r "copy('https://getcomposer.org/installer','composer-setup.php');"Next, run the installer for local installation:
php composer-setup.phpThen, remove the setup file after installation:
php -r "unlink('composer-setup.php');"Finally, run Composer to test if it has been installed correctly or not:
composerNote: You can also install Composer globally by manually specifying an install directory that is in your PATH:
php composer-setup.php --install-dir=/usr/local/bin --filename=composerDeploying Composer-Based Applications on Kinsta
Kinsta’s Application Hosting service can deploy your PHP project from your favorite Git provider (Bitbucket, GitHub, or GitLab), installing the dependent modules specified in your composer.json file.
You can create a hosting account with us risk-free by signing up in the MyKinsta dashboard. You might want to practice deploying a Composer-based application by copying Kinsta’s Hello World – PHP starter application and then uploading it to your own account at a Git provider.
Once your PHP application is available within your own Git provider account, you can follow the steps to add an application within MyKinsta. That will include authorizing MyKinsta to connect to your Git provider and configuring your build environment:

Kinsta automatically configures an Apache web server that serves your index.php file from the main directory of your application.
Summary
In this article, you learned about Composer and how to install it on Windows, Linux, and macOS. You also saw how you can easily deploy your Composer-based applications on the Kinsta Application Hosting platform.
We’ve got quick-start examples for a number of PHP-based applications and for a variety of other common web programming languages.

Muhammad Yasoob Ullah Khalid
Yasoob is an author, blogger, and tech speaker. His books include “Intermediate Python” and “Practical Python Projects,” and he’s currently working on Azure at Microsoft.