Authentication is one of web applications’ most critical and essential features. Web frameworks like Laravel provide many ways for users to authenticate.
You can implement Laravel authentication features quickly and securely. However, implementing these authentication features poorly can be risky, as malicious parties can exploit them.
This guide will teach you all you need to know to get started with your chosen Laravel authentication methods.
Read on!
An Intro To Laravel Authentication
Laravel introduces modules that are made up of “guards” and “providers.” Guards define user authentication for each request, and providers define user retrieval from persistent storage (e.g. MySQL database).
We define our authentication parameters in a file named config/auth.php. It includes several options to tweak and modify Laravel’s authentication behavior.
First, you have to define the authentication defaults. This option controls your application’s default authentication “guard” and password reset options. You may change these defaults as required, but they’re a perfect start for most applications.
Next, you define authentication guards for your application. Here, our default configuration uses session storage and the Eloquent user provider. All authentication drivers have a user provider.
return [
    /*
    Defining Authentication Defaults
    */

    'defaults' => [
        'guard' => 'web',
        'passwords' => 'users',
    ],

    /*
    Defining Authentication Guards

    Supported: "session"
    */

    'guards' => [
        'web' => [
            'driver' => 'session',
            'provider' => 'users',
        ],
     ],

    /*
    Defining User Providers

    Supported: "database", "eloquent"
    */

    'providers' => [
        'users' => [
             'driver' => 'eloquent',
             'model' => App\Models\User::class,
        ],

        // 'users' => [
        //     'driver' => 'database',
        //     'table' => 'users',
        // ],
    ],

    /*
    Defining Password Resetting
    */

    'passwords' => [
        'users' => [
            'provider' => 'users',
            'table' => 'password_resets',
            'expire' => 60,
            'throttle' => 60,
         ],
     ],

     /*
     Defining Password Confirmation Timeout
     */

    'password_timeout' => 10800,
];
Later, we make sure all authentication drivers have a user provider. This defines how the users are retrieved from your database or other storage mechanisms to persist your user’s data. You may configure multiple sources representing each model or table if you have multiple user tables or models. These sources may be assigned to any extra authentication guards you have defined.
Users may also want to reset their passwords. For this, you can specify multiple password reset configurations if you have more than one user table or model in the application and want separate settings based on the specific user types. The expiration time is the number of minutes each reset token will be valid. This security feature keeps tokens short-lived, so they have less time to be guessed. You may change this as needed.
Ultimately, you must define the time before a password confirmation times out, and the user is prompted to re-enter their password via the confirmation screen. By default, the timeout lasts for three hours.
Types of Laravel Authentication Methods
There is no perfect way of authenticating every scenario, but knowing them will help you make better decisions. This and how Laravel is evolving with the new features in Laravel 9. This makes our job as developers way easier when switching authentication modes.
Password Based Authentication
As a rudimentary way to authenticate a user, it is still used by thousands of organizations, but considering current development, it is clearly becoming outdated.
Vendors must enforce complex password implementations while ensuring minimal friction for the end user.
It works pretty straightforward, the user inputs the name and the password, and if in the Database there is a match between those two, the server decides to authenticate the request and let the user access the resources for a predefined time.
Token Based Authentication
This methodology is used where the user is issued a unique token upon verification.
Having this token, now the user can access relevant resources. The privilege is active until the token expires.
While the token is active, the user does not have to use any username or password, but upon retrieving a new token, those two are required.
Tokens are extensively used in multiple scenarios today since they are stateless entities that contain all the authentication data.
Providing a way to separate token generation from token verification gives vendors much flexibility.
Multi-Factor Authentication
As the name suggests, it implies using at least two authentication factors, elevating the security it provides.
Unlike two-factor authentication that involves two factors only, this method can involve two, three, four, and more…
This method’s typical implementation involves using a password, after which the user is sent a verification code on their smartphone. Vendors implementing this method should look for false positives and network outages, which can become big problems while scaling up fast.
How To Implement Laravel Authentication
This section will teach you multiple ways to authenticate your application’s users. Some libraries like Jetstream, Breeze, and Socialite have free tutorials on how to use them.
Manual Authentication
Starting with registering users and creating the needed routes in routes/web.php.
We will create two routes, one to view the form and one to register:
use App\Http\Contrllers\Auth\RegisterController;
use Illuminate\Support\Facades\Route;

/*
Web Routes

Register web routes for your app's RouteServiceProvider
in a group containing the "web" middleware
*/

Route::get('/register', [RegisterController::class], 'create']);

Route::post('/register', [RegisterController::class], 'store']);
And create the controller needed for those:
php artisan make controller Auth/RegisterController -rNow update the code as follows:
namespace App\Http\Controllers\Auth;

use App\Http\Controllers\Controller;
use illuminate\Htpp\Request;

class RegisterController extends Controller
{
    public function create()
    {
        return view('auth.register');
    }

    public function store(Request $request)
    {
    }
}
The controller is empty now and returns a view to register. Let’s make that view in resources/views/auth and call it register.blade.php.

Now with everything in place, we should visit our /register route and see the following form:
public function store(Request $request)
{
    $credentials = $request->only('email', 'password');

    if (Auth::attempt($credentials, $request->filled('remember'))) {
        $request->session()->regenerate();

        return redirect()->intended('/');
    }

    return back()->withErrors([
        'email' => 'The provided credentials do not match our records.',
    ]);
}
Now that we can display a form that a user can complete and get the data for it, we should get the users’ data, validate it, and then store it in the database if everything is fine. Here you should use a database transaction to ensure the data you insert is complete.
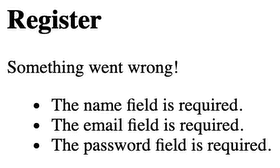
We will use Laravel’s request validation feature to ensure that all three credentials are required. We have to make sure the email has an email format and is unique in the users table and that the password is confirmed and has a minimum of 8 characters:
namespace App\Http\Controllers\Auth;

use App\Http\Controllers\Controller;
use Illuminate\Foundation\Auth\User;
use Illuminate\Http\Request;
use Illuminate\Support\Facades\Hash;

class RegisterController extends Controller
{
    public function store(Request $request)
    {
        /*
        Validation
        */
        $request->validate([
            'name' => 'required',
            'email' => 'required|email|unique:users',
            'password' => 'required|confirmed|min:8',
        ]);

        /*
        Database Insert
        */
        $user = User:;create([
            'name' => $request->name,
            'email' => $request->email,
            'password' => Hash::make($request->password),
        ]);

        return back();
    }

    public function create()
    {
        return view('auth.register');
    }
}
Now that our input is validated, anything going against our validation will throw an error that will be displayed in the form:
Assuming we have created a user account in the store method, we also want to log in the user. There are two ways in which we can do it. We can do it manually or use Auth facade.
After the user logs in, we should not return them to the Register screen but instead to a new page, like a dashboard or homepage. That’s what we are going to do here:
namespace App\Http\Controllers\Auth;

use App\Http\Controllers\Controller;
use App\Providers\RouteServiceProvider;
use Illuminate\Foundation\Auth\User;
use Illuminate\Http\Request;
use Illuminate\Support\Facades\Auth;
use Illuminate\Support\Facades\Hash;

class RegisterController extends Controller
{
    public function store(Request $request)
    {
        /*
        Validation
        */
        $request->validate([
            'name' => 'required',
            'email' => 'required|email|unique:users',
            'password' => 'required|confirmed|min:8',
        ]);

        /*
        Database Insert
        */
        $user = User:;create([
            'name' => $request->name,
            'email' => $request->email,
            'password' => Hash::make($request->password),
        ]);

        Auth::login($user):

        return redirect(RouteServiceProvider::HOME);
    }

    public function create()
    {
        return view('auth.register');
    }
}
And now that we have a user registered and logged -n, we should make sure he can safely log out.
Laravel suggests we invalidate the session and regenerate the token for security after a logout. And this is precisely what we are going to do. We are starting by creating a new /logout route using the LogoutController’s destroy method:
use App\Http\Controllers\Auth\RegisterController;
use App\Http\Controllers\Auth\LogoutController;
use Illuminate\Support\Facades\Route;

/*
Web Routes

Here is where you can register web routes for your application. These
routes are loaded by the RrouteServiceProvider with a group which
contains the "web" middleware group. Now create something great!
*/

Route::get('/register', [RegisterController::class, 'create']);

Route::post('/register', ['RegisterController::class, 'store']);

Route::post('/logout', [Logoutcontroller::class, 'destroy'])
    ->middleware('auth');
Passing the logout through the “auth” middleware is very important. The users should be unable to access the route if they are not logged in.
Now, create a controller as we did before:
php artisan make:controller Auth/LogoutController -rWe can ensure that we get the request as a parameter in the destroy method. We logout the user through the Auth facade, invalidate the session and, regenerate the token, then redirect the user to the homepage:
namespace App\Http\Controllers\Auth;

use App\Http\Controllers\Controller;
use Illuminate\Http\Request;
use Illuminate\Support\Facades\Auth;

class LogoutController extends Controller
{
    public function destroy(Request $request)
    {
        Auth::logout();

        $request->session()->invalidate();

        $request->session()->regenerateToken();

        return redirect('/');
     }
}
Remembering Users
Most, if not all, modern web applications provide a “remember me” checkbox on their login form.
If we want to provide a “remember me” functionality, we may pass a boolean value as the second argument to the attempt method.
When valid, Laravel will keep the user authenticated indefinitely or until they are manually logged out. The user table must include the string remember_token (this is why we regenerate the tokens) column, where we will store our “remember me” token.
The default migration for users already includes it.
First things first, you have to add the Remember Me field to your form:

And after this, get the credentials from the request and use them on the attempt method on the Auth facade.
If the user should be remembered, we will log him in and redirect him to our homepage. Otherwise, we will throw an error:
public function store(Request $request)
{
    $credentials = $request->only('email', 'password');

    if (Auth::attempt($credentials, $request->filled('remember'))) {
        $request->session()->regenerate();

        return redirect()->intended('/');
    }

    return back()->withErrors([
        'email' =>
Resetting Passwords
Most web applications today provide ways for users to reset their passwords.
We will make another route for the forgotten password and create the controller as we did. Additionally, we will add a route for the reset password link that contains the token for the entire process:
Route::post('/forgot-password', [ForgotPasswordLinkController::class, 'store']);

Route::post('/forgot-password/{token}', [ForgotPasswordController::class, 'reset']);
Inside the store method, we will take the email from the request and validate it as we did.
After this, we can use the sendResetLink method from the password facade.
And then, as a response, we want to return the status if it succeeded in sending the link or errors otherwise:
namespace App\Http\Controllers\Auth;

use App\Http\Controllers\Controller;
use Illuminate\Http\Request;
use Illuminate\Support\Facades\Password;

class ForgotPasswordLinkController extends Controller
{
    public function store(Request $request)
    {
        $request->validate([
             'email' => 'required|email',
        ]);

        $status = Password::sendResetLink(
            $request->only('email');
        );

        return $status === Password::RESET_LINK_SENT
            ? back()->with('status', __($status))
            : back()->withInput($request->only('email'))->withErrors(['email' => __($status)]);
     }
}
Now that the reset link has been sent to the user’s email, we should take care of the logic of what happens after that.
We will get the token, email, and new password in the request and validate them.
After this, we can use the reset method from the password facade to let Laravel take care of everything else behind the scenes.
We are always going to hash the password to keep it secure.
In the end, we will check if the password was reset, and if it were, we will redirect the user to the login screen with a success message. Otherwise, we display an error that it could not be reset:
namespace App\Http\Controllers\Auth;

use App\Http\Controllers\Controller;
use Illuminate\Http\Request;
use Illuminate\Support\Facades\Hash;
use Illuminate\Support\Facades\Password;
use Illuminate\Support\Str;

class ForgotPasswordController extends Controller
{
    public function store(Request $request)
    {
        $request->validate([
            'token' => 'required',
            'email' => 'required|email',
            'password' => 'required|string|confirmed|min:8',
        ]);

        $status = Password::reset(
            $request->only('email', 'password', 'password_confirmation', 'token'),
            function ($user) use ($request) {
                $user->forceFill(
                    'password' => Hash::make($request->password),
                    'remember_token' => Str::random(60)
                ])->save();
            }
        );

        return $status == Password::PASSWORD_RESET
            ? redirect()->route('login')->with('status', __($status))
            : back()->withInput($request->only('email'))->withErrors(['email' => __($status)]);
    }
}
Laravel Breeze
Laravel Breeze is a simple implementation of Laravel authentication features: login, registration, password reset, email verification, and password confirmation. You can use it to implement authentication in your new Laravel application.
Installation and Setup
After creating your Laravel application, all you have to do is configure your database, run your migrations, and install the laravel/breeze package through composer:
composer require laravel/breeze –devAfter this, run the following:
php artisan breeze:installWhich will publish your authentication views, routes, controllers, and other resources it uses. After this step, you have complete control of everything that Breeze provides.
Now we have to render our application to the frontend, so we will install our JS dependencies (which will use @vite):
npm install:
npm run devAfter this, login and register links should be on your homepage, and everything should work smoothly.
Laravel Jetstream
Laravel Jetstream extends Laravel Breeze with useful features and other frontend stacks.
It provides login, registration, email verification, two-factor authentication, session management, API support via Sanctum, and optional team management.
You must choose between Livewire and Inertia on the frontend when installing Jetstream. On the backend, it uses Laravel Fortify, which is a frontend agnostic, “headless” authentication backend for Laravel.
Installation and Setup
We will install it through composer in our Laravel Project:
composer require laravel/jetstreamAfter this, we will run the php artisan jetstream:install [stack] command, which accepts [stack] arguments Livewire or Inertia. You can pass the –team option to enable the teams feature.
This will also install Pest PHP for testing.
And finally, we have to render the frontend of our application using the following:
npm install
npm run dev
Laravel Fortify
Laravel Fortify is a backend authentication implementation that’s frontend agnostic. You don’t have to use Laravel Fortify to implement Laravel’s authentication features.
It’s also used in starter kits like Breeze and Jetstream. You can also use Fortify standalone, which is just a backend implementation. If you use it standalone, your frontend must call the Fortify routes.
Installation and Setup
We can install Fortify through composer:
composer require laravel/fortifyNow we have to publish Fortify’s resources:
php artisan vendor:publish –provider="Laravel\Fortify\FortifyServiceProvider"After this, we will create a new app/Actions directory in addition to the new FortifyServiceProvider, configuration file, and database migrations.
Finally, run:
php artisan migrateOr:
php artisan migrate:freshAnd your Fortify is ready to use.
Laravel Socialite
Laravel includes a straightforward OAuth-based user authentication feature. It supports social logins via Facebook, Twitter, LinkedIn, Google, Bitbucket, GitHub, and GitLab.
Installation
We can install it through composer:
composer require laravel/socialiteSetup and Usage
After we have installed it, we have to add the credentials for the OAuth provider that our application uses. We will add them in config/services.php for each service.
In the configuration, we should match the key with the previous services. Some of those keys include:
- twitter (For OAuth 1.0)
- twitter-oauth-2 (For OAuth 2.0)
- github
- gitlab
- bitbucket
One service configuration may look like this:
'google' => [
    'client_id' => env("GOOGLE_CLIENT_ID"),
    'client_secret' => env("GOOGLE_CLIENT_SECRET"),
    'redirect' => "http://example.com/callback-url",
],
Authenticating Users
For this action, we will need two routes, one for redirecting the user to the OAuth provider:
use Laravel\Socialite\Facades\Sociliate;

Route::get('/auth/redirect', function () {
    return Socialite:;driver('google')->redirect();
});
And one for the callback from the provider after authentication:
use Laravel\Socialite\Facades\Socialite;

Route:;get('/auht/callback', function () {
    $user = Socialite:;driver('google')->user();

    // Getting the user data
    $user->token;
});
Socialite provides the redirect method, and the facade redirects the user to the OAuth provider, while the user method examines the incoming request and retrieves the user information.
After we have received our user, we have to check if it exists in our database and authenticate it. If it does not exist, we will create a new record to represent the user:
use App\Models\User;
use Illuminate\Support\Facades\Auth;
use Laravel\Socialite\Facades\Socialite;

Route::get('/auth/callback', function () {
   /*
   Get the user
   */
   $googleUser = Socialite::driver('google')->user();

   /*
   Create the user if it does not exist
   Update the user if it exists

   Check for google_id in database
   */
   $user = User::updateOrCreate([
       'google_id' => $googleUser->id,
   ], [
       'name' => $googleUser->name,
       'email' => $googleUser->email,
       'google_token' => $googleUser->token,
       'google_refresh_token' => $googleUser->refreshToken,
   ]);

   /*
   Authenticates the user using the Auth facade
   */
    Auth::login($user);

    return redirect('/dashboard');
});
If we want to limit the user’s access scopes, we may use the scopes method, which we will include with the authentication request. This will merge all previously specified scopes with the specified ones.
An alternative to this is to use the setScopes method that overwrites every other existing scope:
use Laravel\Socialite\Facades\Socialite;

return Socialite::driver('google')
    ->scopes(['read:user', 'write:user', 'public_repo'])
    ->redirect();

return Socialite::driver('google')
    ->setScopes(['read:user', 'public_repo')
    ->redirect();
Now that we know everything and how to get a user after the callback, let’s look at some of the data we can get from it.
OAuth1 User has token and tokenSecret:
$user = Socialite::driver('google')->user();

$token = $user->token;
$tokenSecret = $user->tokenSecret;
OAuth2 provides token, refreshToken, and expiresIn:
$user = Socialite::driver('google')->user();

$token = $user->token;
$refreshToken = $user->refreshToken;
$expiresIn = $user->expiresIn;
Both OAuth1 and OAuth2 provide getId, getNickname, getName, getEmail, and getAvatar:
$user = Socialite::driver('google')->user();

$user->getId();
$user->getNickName();
$user->getName();
$user->getEmail();
$user->getAvatar();
And if we want to get user details from a token (OAuth 2) or a token and secret (OAuth 1), sanctum provides two methods for this: userFromToken and userFromTokenAndSecret:
use Laravel\Socialite\Facades\Socialite;

$user = Socialite:;driver('google')->userFromToken($token);
$user = Socialite::driver('twitter')->userFromTokenAndSecret($token, $secret);
Laravel Sanctum
Laravel Sanctum is a light authentication system for SPAs (Single Page Applications) and mobile apps. It lets users generate multiple API tokens with specific scopes. These scopes specify allowed actions by a token.
Usages
Sanctum can be used to issue API Tokens to the user without the intricacies of OAuth. Those tokens typically have long expiration times, like years, but may be revoked and regenerated by the user at any time.
Installation and Setup
We can install it via composer:
composer require laravel/sanctumAnd we have to publish the configuration and migration files:
php artisan vendor:publish –provider="Laravel\Sanctum\SanctumServiceProvider"Now that we have generated new migration files, we have to migrate them:
php artisan migrate </code> or <code> php artisan migrate:freshHow To Issue API Tokens
Before issuing tokens, our User model should use the Laravel\Sanctum\HasApiTokens trait:
use Laravel\Sanctum\HasApiTokens;

class User extends Authenticable
{
    use HasApiTokens;
}
When we have the user, we can issue a token by calling the createToken method, which returns a Laravel\Sanctum\NewAccessToken instance.
We can call the plainTextToken method on the NewAccessToken instance to see the SHA-256 plain text value of the token.
Tips and Best Practices for Laravel Authentication
Invalidating Sessions On Other Devices
As we have discussed previously, invalidating the session is crucial when the user logs out, but that should also be available as an option for all the owned devices.
This feature is usually used when the user changes or updates their password, and we want to invalidate their session from any other device.
Provided with the Auth facade, this is an easy task to achieve. Considering that the route we are using has the auth and auth.session middleware, we can use the logoutOtherDevices static method of the facade:
Route::get('/logout', [LogoutController::class, 'invoke'])
    ->middleware(['auth', 'auth.session']);
use Illuminate\Support\Facades\Auth;

Auth::logoutOtherDevices($password);
Configuration With Auth::routes()
The routes method of the Auth facade is just a helper to generate all the routes required for user authentication.
The routes include Login (Get, Post), Logout (Post), Register (Get, Post), and Password Reset/Email (Get, Post).
When you are calling the method on the facade, it does the following:
public static fucntion routes(array $options = [])
{
    if (!static::$app->providerIsLoaded(UiServiceProvider::class)) {
        throw new RuntimeException('In order to use the Auth:;routes() method, please install the laravel/ui package.');
    }

    static::$app->make('router')->auth($options);
}
We are interested in what happens when the static method is called on the router. This can be tricky due to the fact of how facades work, but the following method called is like this:
/**
Register the typical authentication routes for an application.

@param array $options
@return void
*/
public function auth(array $options = [])
{
    // Authentication Routes...
    $this->get('login', 'Auth\[email protected]')->name('login');
    $this->post('login', 'Auth\[email protected]');
    $this->post('logout', 'Auth\[email protected]')->name('logout');

    // Registration Routes...
    if ($options['register'] ?? true) {
        $this->get('register', 'Auth\[email protected]')->name('register');
        $this->post('register', 'Auth\[email protected]');
    }

    // Password Reset Routes...
    if ($options['reset'] ?? true) {
        $this->resetPassword();
    }

    // Email Verification Routes...
    if ($options['verify'] ?? false) {
        $this->emailVerification();
    }
}
By default, it generates all routes besides the email verification one. We will always have the Login and Logout routes, but the other ones we can control through the options array.
If we want to have only login/logout and register, we can pass the following options array:
$options = ["register" => true, "reset" => false, "verify" => false];Protecting Routes and Custom Guards
We want to make sure that some routes can be accessed only by authenticated users and can be quickly done by adding either calling the middleware method on the Route facade or chaining the middleware method on it:
Route::middleware('auth')->get('/user', function (Request $request) {
    return $request->user();
});

Route::get('/user', function (Request $request) {
    return $request->user();
})->middleware('auth');
This guard ensures that incoming requests are authenticated.
Password Confirmation
For added website security, you often want to confirm a user’s password before moving on with any other task.
We must define a route from the confirm password view to handle the request. It will validate and redirect the user to their intended destination. At the same time, we will make sure that our password appears confirmed in the session. By default, the password has to be reconfirmed every three hours, but this can be changed in the configuration file at config/auth.php:
use Illuminate\Http\Request;
use Illuminate\Support\Facades\Hash;
use Illuminate\Support\Facades\Redirect;

Route::post('/confirm-password', function (Request $request) {
    if (!Hash::check($request->password, $request->user()->password)) {
        return back()->withErrors([
            'password' => ['The provided password does not match our records.']
        ]);
    }

    $request->session()->passwordConfirmed();

    return redirect()->intended();
})->middleware(['auth']);
Authenticable Contract
The Authenticable contract located at Illuminate\Contracts\Auth defines a blueprint of what the UserProvider facade should implement:
namespace Illuminate\Contracts\Auth;

interface Authenticable
{
    public function getAuthIdentifierName();

    public function getAuthIdentifier();

    public function getAuthPassord();

    public function getRememberToken();

    public function setRememberToken($value);

    public function getrememberTokenName();
}
The interface allows the authentication system to work with any “user” class that implements it.
This holds regardless of what ORM or storage layers are used. By default, Laravel has the App\Models\User that implements this interface, and this can also be seen in the configuration file:
return [
    'providers' => [
        'users' => [
            'driver' => 'eloquent',
            'model' => App\Models\User::class,
        ],
     ],
];
Authentication Events
There are plenty of events that are dispatched during the entirety of the authentication process.
Depending on your goals, you can attach listeners to those events in your EventServiceProvider.

Quickly Create New Users
Creating a new user quickly can be done through the App\User:
$user = new App\User();
$user->password = Hash::make('strong_password');
$user->email="[email protected]";
$user->name="Username";
$user->save();
Or through the create static method on the User facade:
User::create([
 'password' => Hash::make('strong-password'),
 'email' => '[email protected]',
 'name' => 'username'
]);
Summary
The Laravel ecosystem has a lot of starter kits to get your app up and running with an Authentication system, like Breeze and Jetstream. They are highly customizable as the code is generated on our side, and we can modify it as much as we want, using it as a blueprint if need be.
There are many security concerns regarding authentication and its intricacies, but all of these can be solved easily through the tools that Laravel provides. These tools are highly customizable and easy to use.
Deploy your Laravel apps quickly and efficiently with our fast Laravel hosting service. See your app in action with a free trial.
Get all your applications, databases and WordPress sites online and under one roof. Our feature-packed, high-performance cloud platform includes:
- Easy setup and management in the MyKinsta dashboard
- 24/7 expert support
- The best Google Cloud Platform hardware and network, powered by Kubernetes for maximum scalability
- An enterprise-level Cloudflare integration for speed and security
- Global audience reach with up to 35 data centers and 275 PoPs worldwide
Get started with a free trial of our Application Hosting or Database Hosting. Explore our plans or talk to sales to find your best fit.