Version control has changed the way we build software. It’s a precise tool that lets us keep track of the changes made throughout the development of a project, and its usage has also extended to low-code platforms like WordPress.
In this article, we’ll dive into using GitHub to develop awesome WordPress sites. You’ll learn about Git, the relation between it and GitHub, best practices, and follow a step-by-step guide on using GitHub and WordPress.
Let’s start with the basics.
What Is Version Control and Why Is It So Important?
If you don’t have previous experience with coding, the concepts of version control, Git, and GitHub may seem quite weird to you. First, let’s define each one in plain English.
Version Control
Version control is the process of tracking and managing all the changes in a project. It allows you to review, compare, and even revert the entire project to a previous state.
Any serious web development project should use version control software (and now you can use it on WordPress projects too).
Git
Git is by far the most used version control software out there. It’s an efficient system that comes with all the features you need to work collaboratively, manage the history of your project, and correct mistakes if needed.
With Git, everything is recorded, so once you’ve stored a change in a commit, you can take a look at the past, and come back to that change. You can think of it as an unlimited “undo” action, so you’ll never lose anything.
GitHub
GitHub, on the other hand, is a related yet different tool. It’s a hosting platform that stores Git repositories and lets you collaborate with people all around the globe. GitHub is such a massively used tool that many WordPress developers store their plugins and themes there, and even more impressive, the WordPress project uses GitHub to work on open-source projects like the Gutenberg editor.
Of course, there are other Git hosting platforms like GitLab or BitBucket, but we’ll be focusing on GitHub throughout this article.
Git and GitHub are tools that every developer needs. Whether you’re a backend, frontend, or WordPress developer, being skilled with these tools represents a huge advantage in the day-to-day development of a project.
Benefits of Integrating GitHub With WordPress
There are many benefits of using GitHub for WordPress development. Starting with the most obvious one; it allows us to incorporate the typical workflow of a Git project into the development of a plugin or theme.
It lets you as a developer bring your typical workflow for any other web project into WordPress development. If you already know how to use the tool and feel comfortable while using it, it would be great to incorporate it while customizing your WordPress site.
Just imagine being able to take advantage of the version control features, like rolling back to the version previous to the change that messed up your site, or using Git branches to work and test on that crazy idea that you came up with within a coding afternoon.
You need to remember that after all, WordPress is a collection of files mainly written in PHP (a plain text format), so you can use Git and GitHub to store and manage the atomic changes made in those files.
Building a WordPress project collaboratively is another powerful reason for using WordPress and GitHub together. You and your team can work on different features at the same site without threatening to take your production site down.
Once you’re done you would just pull up the latest changes from main, or use any sort of magic pull button from your Kinsta dashboard (keep reading).
To sum up the benefits of the GitHub and WordPress combination:
- Lets you use your normal workflow in WordPress development
- Can prevent your site from going down after an error in some PHP file by rolling back to the previous version
- It lets you collaborate simultaneously on the features of your site.
Getting Started With Git, GitHub, and WordPress
In this section, you’re going to learn how to build a plugin or theme using GitHub and WordPress.
Before starting, let’s grab the main idea of this process. You’re going to start a local Git project, where you’re going to build the first versions of your plugin/theme — we talk about them since they’re the most usually edited files in a WordPress project — then you’ll create a GitHub repository and clone it inside your WordPress live installation.
Let’s get into it!
Step 1: Install Git on Your Computer
This may seem a little bit obvious, but you need to have Git installed on your machine before you start working on your plugin or theme.
To install Git just go to the official downloads page and pick up the suited package for your operating system.
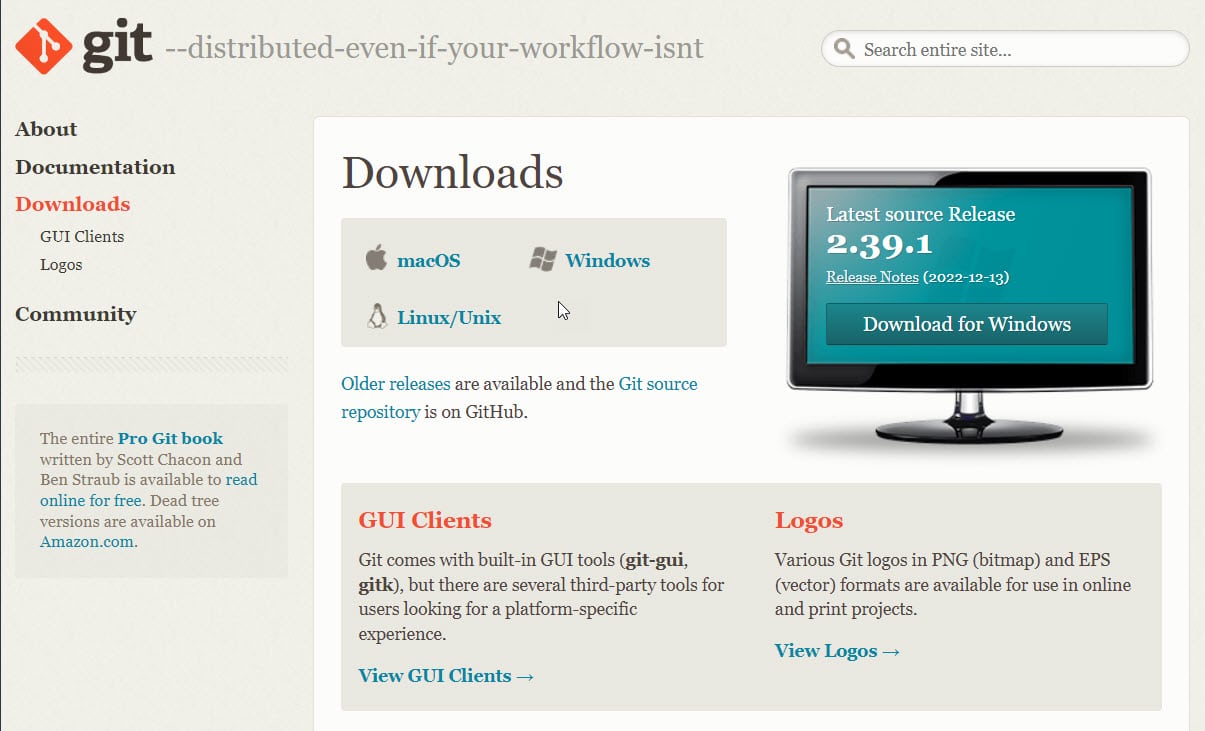
If you’re running macOS or Linux, you may need to run a command in a terminal, whereas if you use Windows, you should fire up the wizard installer which can take up to a few minutes.
To verify Git is installed, run the following command in a terminal or command prompt:
git --version
# git version "your version"
Step 2: Sign Up on GitHub and Create a Repository
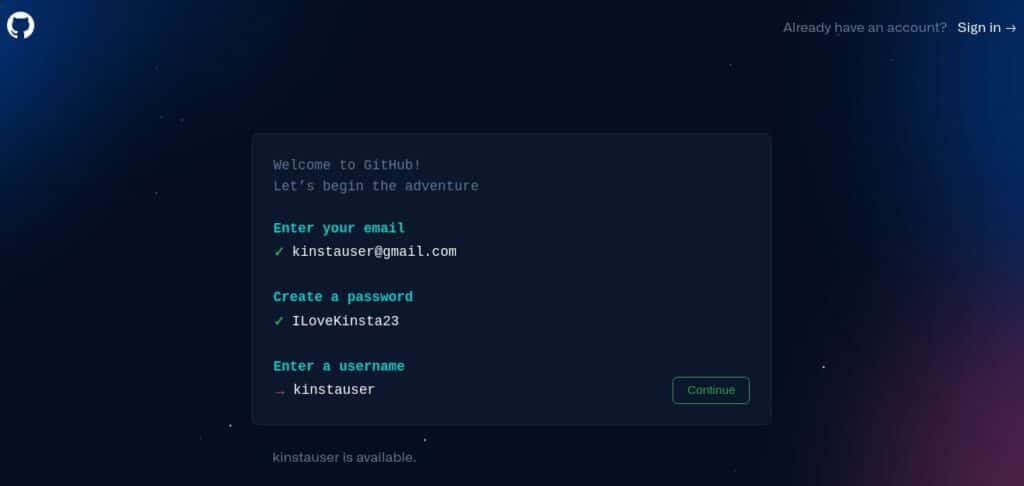
Create or log in to a GitHub account by visiting GitHub’s sign-up page.
After signing in, create a repository for your plugin or theme by going to the new repository link.
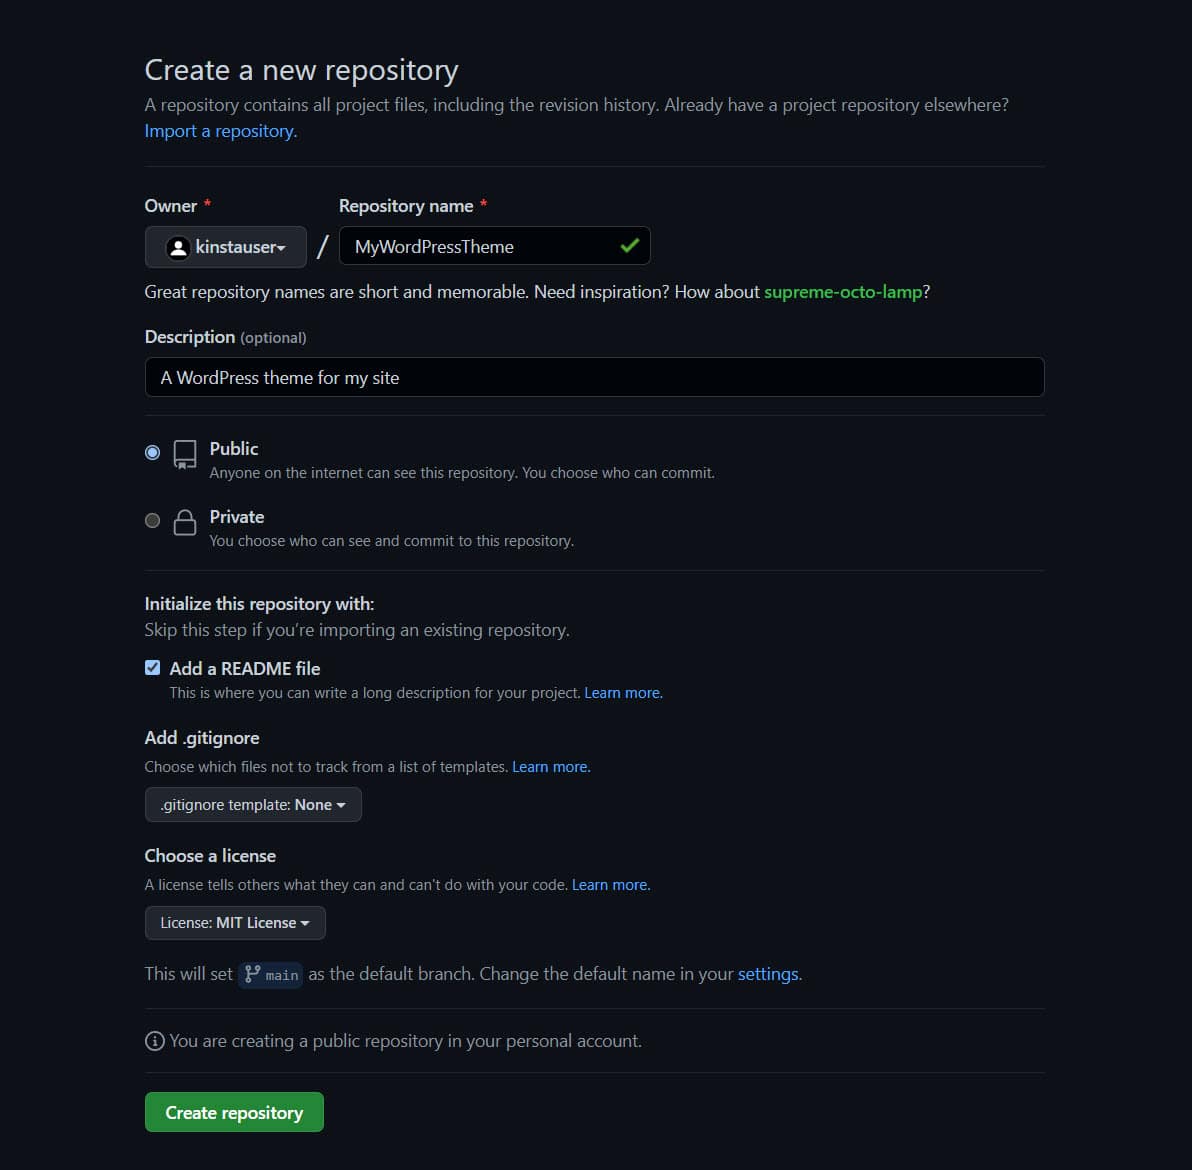
Fill the repository name, with the name of the plugin you’re going to build, in my case: MyWordPressTheme, add a description with a quick overview of your project, select whether your repo is going to be public or private (public: anyone can view it and fork it, private: only you can access it), decide if you want to include a README and a license from the start, and click on Create repository.
Step 3: Set Up Your Local WordPress Environment
Now, you need to set up your local WordPress environment. We have an entire article on how to install WordPress locally, so use the best option according to your operating system.
You can set up a local WordPress environment using XAMPP, but we recommend using DevKinsta, a free local WordPress development suite available in Windows, Linux, and macOS.
Let’s see how we can do this using DevKinsta.
First, download the right DevKinsta version for your operating system from our download page. Then run the installation wizard, this should take a few minutes. For more information check our knowledge base on installing DevKinsta.
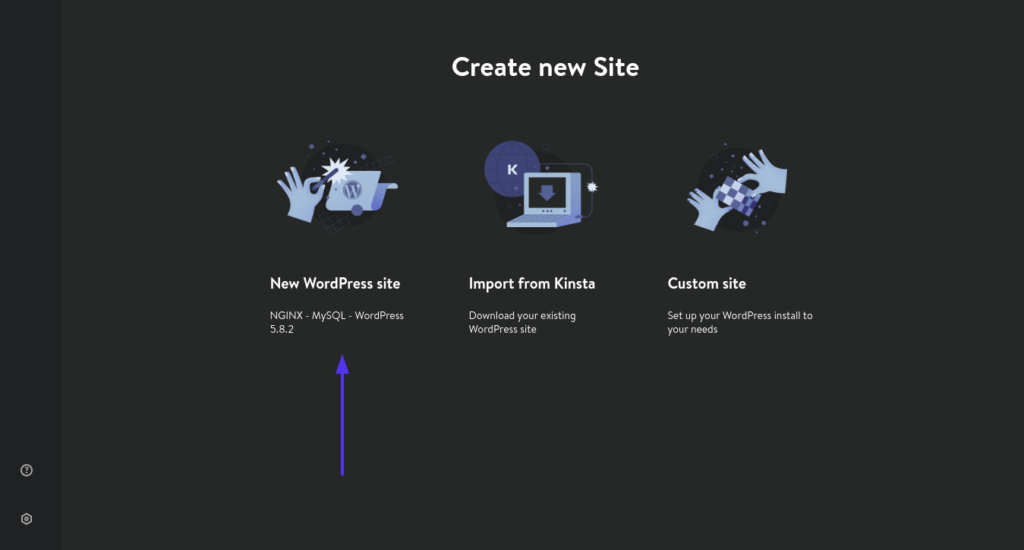
Then create a site from the main menu. We’re going to use the “New WordPress site” option.
Now, enter your site name, WordPress admin username, and password. Click on the Create site button.
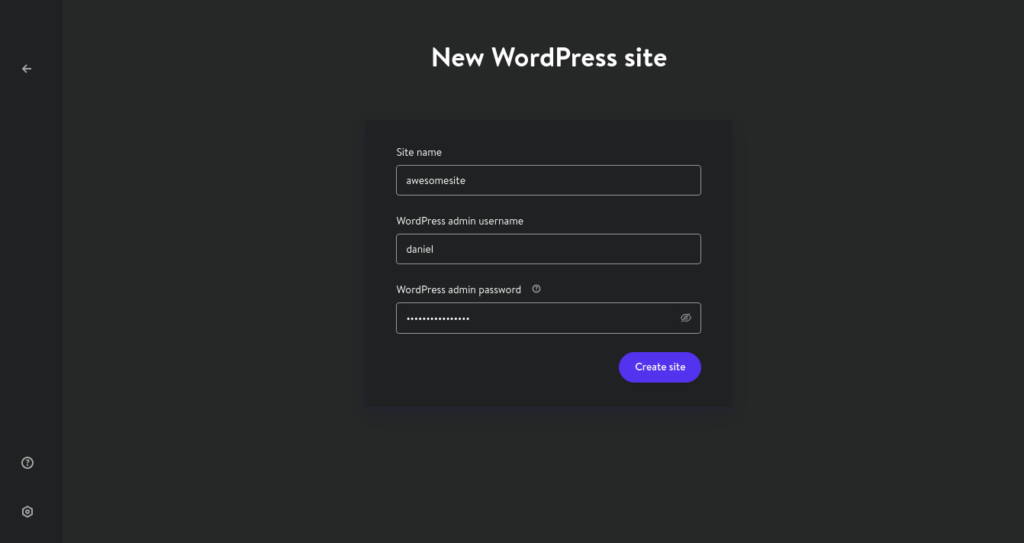
This will automatically create a WordPress site in the folder /home/username/DevKinsta/public/site-name, you can open it by clicking on the “site path” section.

You can take a look at the WordPress file structure in a file manager.
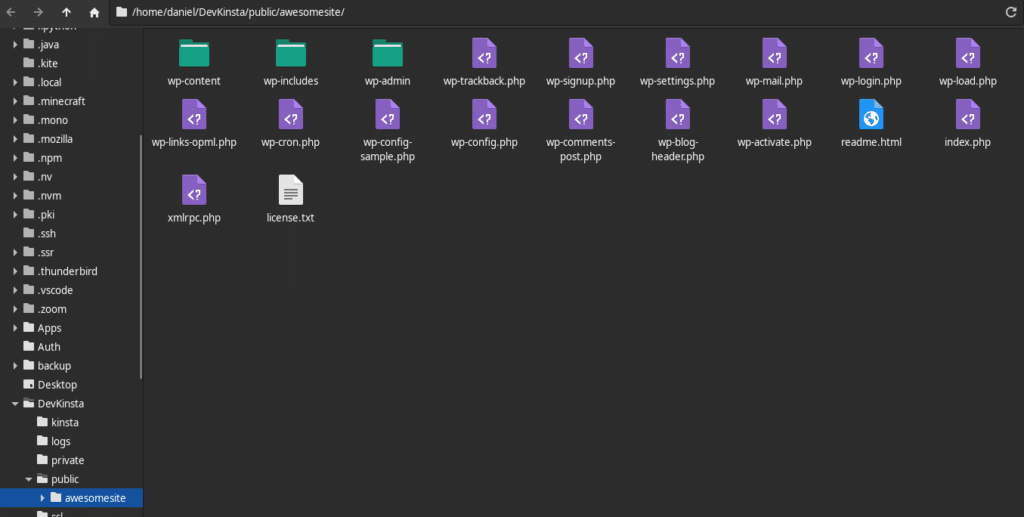
Now you have a fully functional WordPress site in your home directory.
Step 4: Clone the GitHub Repo Into Your Local Machine
You have a remote GitHub repository with the README and license files, it’s time to bring them into your local environment and start developing the theme.
In this example, we’re building a theme, but you would do the exact same process creating a plugin.
Go to your WordPress site’s folder and enter the wp-content directory, which contains all the plugins and themes available.
After creating the site with DevKinsta, you need to enter the site path available in the Site Info and go to the wp-content folder.
If you created your site using XAMPP, you would enter the /opt/lampp/htdocs/site/wp-content folder on Linux, and macOS, whereas on Windows you just need to go to the folder in which you extracted the WordPress source code.
Then, as we’re building a theme, we go to the themes folder and clone the repository we created on GitHub. Remember to set up your SSH keys on GitHub in case you’ve not done it.
Here is this whole process with a few commands:
cd /home/username/DevKinsta/public/site-name/wp-content/themes # or your wordpress site location
git clone [email protected]:YourUsername/mywordpresstheme.git
cd mywordpresstheme/
Now you can actually start working on your WordPress theme or plugin.
Step 5: Add, Commit, and Push Changes to Your Remote Repo
It’s time to build your theme.
One of the advantages of building a theme or plugin on your local machine is that you can mess around, use the tools, make all the changes, and test all the techniques you want. So go ahead and create the best plugin or theme you can.
However, if you’re not quite familiar with the process of creating a WordPress theme from scratch, here are some files you should take into account.
- index.php: The main file of the theme structure (required)
- styles.css: Defines the style of the site, using CSS language (required)
- front-page.php: Creates the main view of the site; the / (root) page
- footer.php: Defines the footer of the site, and it’s used in most of the site pages
- functions.php: Allows to generate custom functionality
- header.php: Defines the header
- 404.php: Defines the “404 error” view
- page.php: Pages generated by the admins’ site
- screenshot.png: Image used as a logo of the theme
- single.php: Default view used for posts.
For further instructions, you can refer to the WordPress developer’s page on Theme Development.
Once you’ve developed your theme it’s time to add and commit all the changes to GitHub.
First of all, run git status to see exactly what changed.
git status
…
Untracked files:
(use "git add ..." to include in what will be committed)
404.php
assets/
footer.php
front-page.php
functions.php
header.php
index.php
page.php
screenshot.png
single.php
style.css
Now, add all the files in the current directory and commit them.
git add ./
git commit -m "Added theme files"
Finally, push all those changes to the remote repo on GitHub.
git pushStep 6: SSH Into Your WordPress Site and Clone the Repo
You’ve built the theme, it’s time to use it in your live WordPress site.
To do this you need to connect to WordPress using SSH. This allows you to interact with the server your WordPress site is located and clone the repository of your theme.
Most hosting services offer a way to use SSH, for more information visit your provider’s documentation.
We’re going to use Kinsta’s SSH feature but keep in mind you’ll be able to do this with other hosting services.
First, get your SSH command and password.
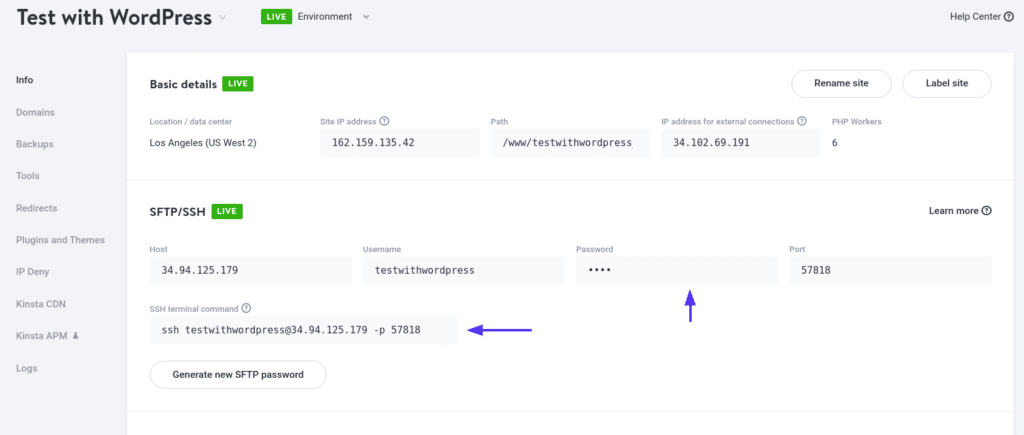
Paste your SSH command into a terminal or command prompt, and input the password (using Kinsta you’ll need to authenticate to copy the SSH password).
If you authenticated correctly you’re now inside of your WordPress site file structure.
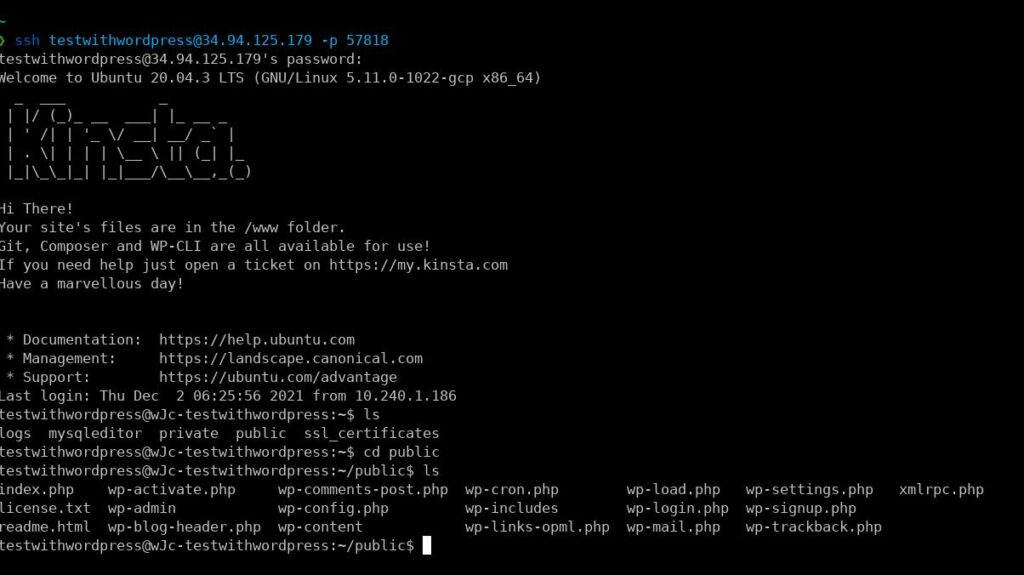
Now, you’ll have to navigate to your site’s folder, which is usually located on /www/name-site/public/. From there you can go to the themes folder and clone your repo into it.
cd /www/name-site/public/wp-content/themes

git clone https://github.com/yourusername/MyWordPressTheme.git
Notice we’re using HTTP when cloning the GitHub repo since we won’t make any changes to the theme on the server. We’ll only create changes using our favorite code editor in our local machine and not in an ugly terminal editor on the server.
From now on, every time you want to pull the latest changes of the remote repo into your server, you would simply run:
git pull
…
Fast-forward
front-page.php | 2 +-
1 file changed, 1 insertion(+), 1 deletion(-)
Step 7: Enter the WordPress Admin Activate Your Theme
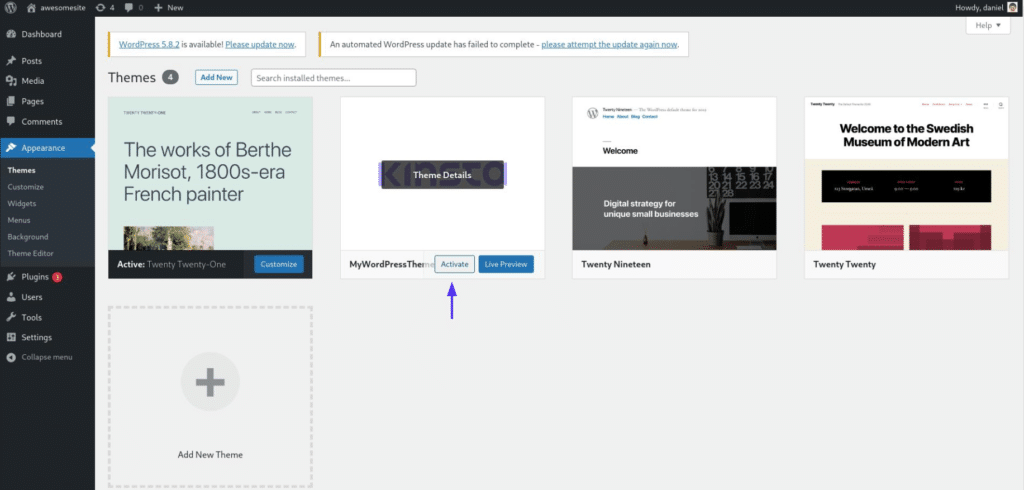
Once you’ve downloaded the theme you built it’s time to activate it on your live WordPress site. Log in to your WordPress admin dashboard usually located at:
https://yourdomain.com/wp-login.phpThen, go to your Appearance section and activate your awesome theme.
If you’re working with plugins you would do the same process, except for placing your plugin inside the /wp-content/plugins folder.
Congratulations — you’ve just built a WordPress theme using Git, GitHub, and WordPress!
Using MyKinsta To Integrate GitHub With WordPress
To make WordPress developers’ lives easier, we’re launching GitHub Deployment for WordPress. GitHub Deployment connects to your GitHub account and lets you enjoy the process of developing your site locally while allowing you to push it to live with one click.
The only thing you need is a MyKinsta account and the ability to use version control for WordPress development.
Advantages of Using GitHub Deployment
Here are the top advantages of this process:
- Merges the experience of developing locally and deploying remotely to WordPress
- Lets you use all the features of version control with Git and GitHub
- Simpler than the manual method shown above
- Auto-deploy changes from your GitHub repo
For now, you can only use this feature in staging environments, but we’ll see how to push all the changes to your live site.
Also, you must download WordPress core files, and commit them to your repo. You can’t just commit a theme or a plugin, since upon deployment all staging files are removed.
With that being said, the process is way easier than you might think.
Let’s see how you can integrate GitHub with WordPress using MyKinsta!
Step 1: Create a GitHub Repo With All the WordPress Core Files
This is similar to the method used above, except you’ll need to commit all the files of the WordPress installation to your GitHub repo.
First, create a repo on GitHub and clone it to your machine so you can start building the site in your local environment.
git clone [email protected]:youusername/WordPress-site.git # After you created the repo on GitHubThen download WordPress’ source code and unzip its contents (files in the wordpress/ folder) inside the repository you just cloned. You can do it manually using a graphic file manager or run the following commands:
unzip path/to/wordpress/zip
cp -a wordpress/. path/to/your/repo/
Notice how we’re extracting the zip file into the current directory and then copying the contents of it into our repo using the special cp dot (/.) syntax.
Now, the structure of your repo should look somewhat like this:
.
├── .git
├── wp-admin
├── wp-content
├── wp-includes
├── .gitignore
├── index.php
├── LICENSE
├── license.txt
├── readme.html
├── README.md
├── wp-activate.php
…
├── wp-settings.php
├── wp-signup.php
├── wp-trackback.php
└── xmlrpc.ph
Modify your project, once you’re done commit all the changes to the GitHub repo:
git add ./
git commit -m "Added WordPress files"
This part is where you should invest more of your time. You’ll see how straightforward it is to integrate GitHub with WordPress.
Step 2: Create or Use a Site on Your MyKinsta Dashboard
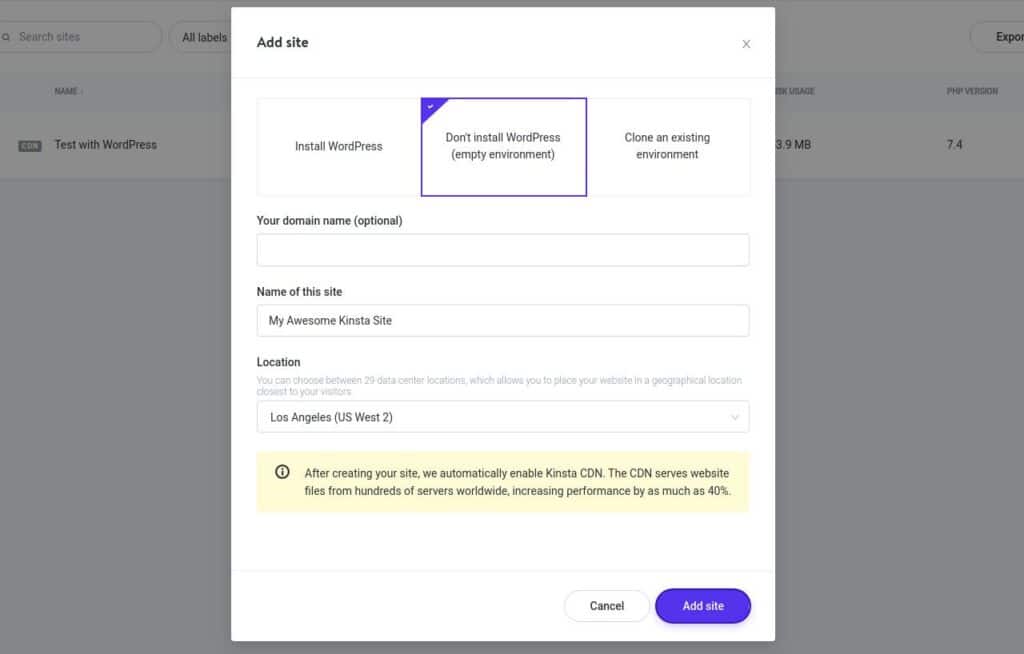
If you already have a site you can skip this step, but If you’re going to create a new site, it’s better to boot up an empty environment. It’ll take less time than a full WordPress installation.
Go to your MyKinsta dashboard, click on the Sites section, then snap the Add site button. Fill in the information and within a couple of minutes, you’ll have an empty environment to work with.
Step 3: Change To a Staging Environment
As mentioned earlier, this feature is only available in staging environments.
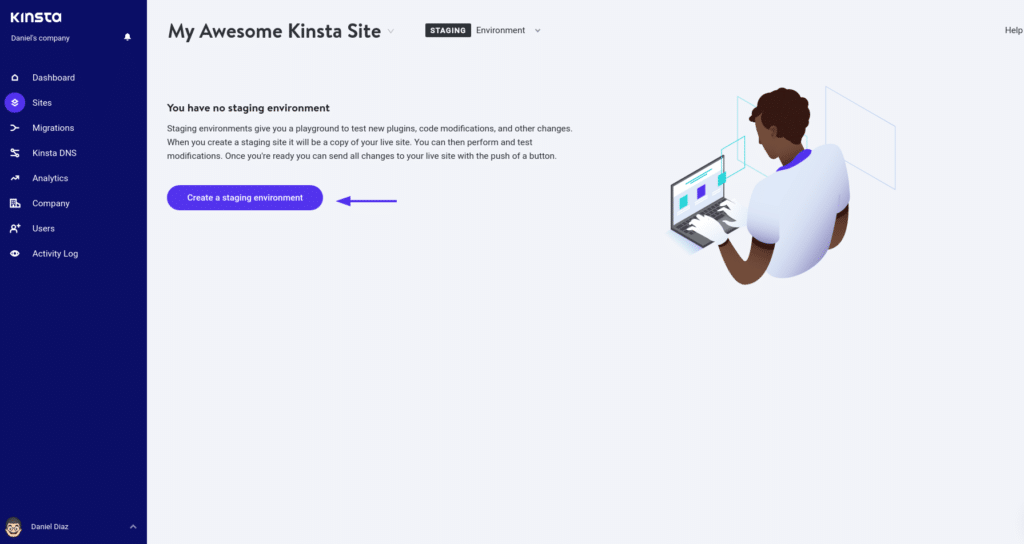
To create a staging environment go to your site’s dashboard click on the Environment selector located at the top of the page, and select Staging from the drop-down menu.

Now, click on the Create a staging environment button. Depending on the number of files you have in your live environment, it’ll take more or less time to boot up. That’s why it’s recommended to create an empty environment if you don’t have a live site at the start.
Once you’ve deployed your repo to the staging environment you can push it to the live environment. We’ll see this in action later on.
Step 4: Connect To GitHub
To pull a repository from GitHub, MyKinsta needs access to your GitHub account. Don’t worry — this happens with every service that needs permissions to a specific repo.
Go to the Deployment section available once you’ve created your staging environment, and click on the Begin setup button.

Now, you’ll be redirected to GitHub’s authentication page, so you can configure the deployment of your GitHub repo.
Once it’s done, you can choose the Organization (usually your personal account) you want to pull your repo from, the Repository in which you developed your WordPress site, and the branch you want to pull from (in most cases, it’s “main”).
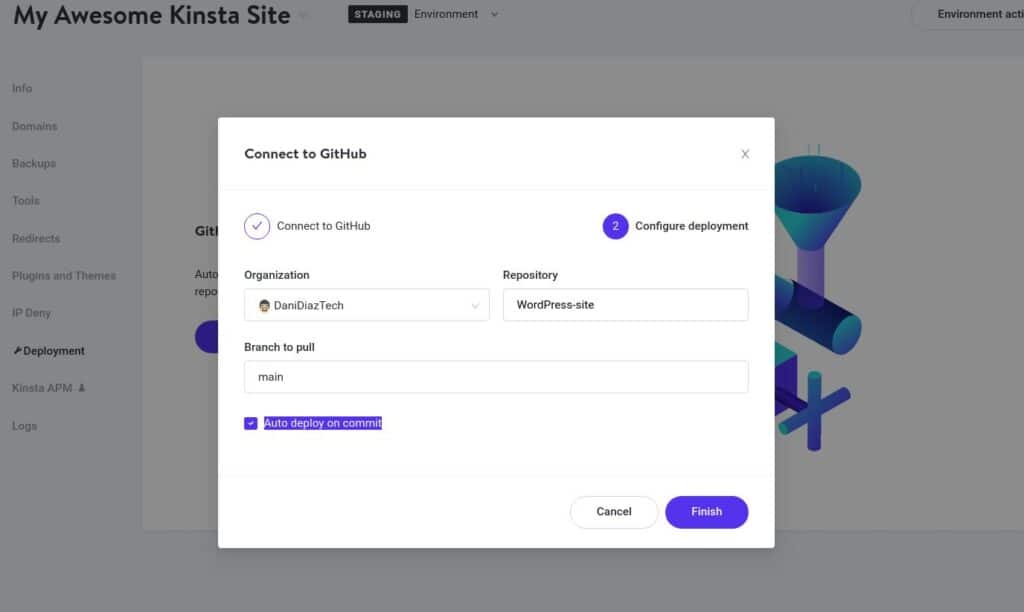
You can check the Auto deploy on commit box if you want MyKinsta to deploy every change you made to the branch you selected.
Be careful with this option, you only want to auto-deploy when you’re working in a specific branch for each feature and you’re only committing to the main branch when merging those features.
Click on the Finish button. Now, you can deploy your repo into your Staging environment.
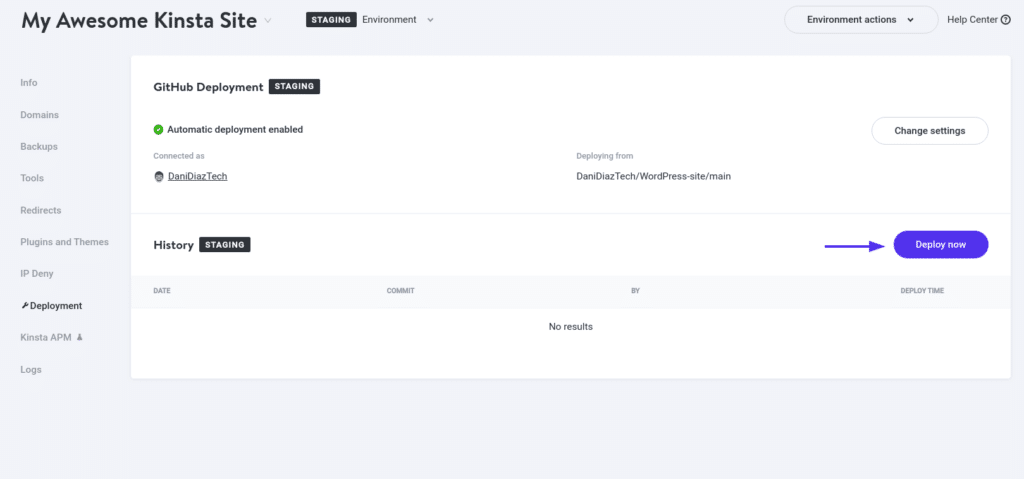
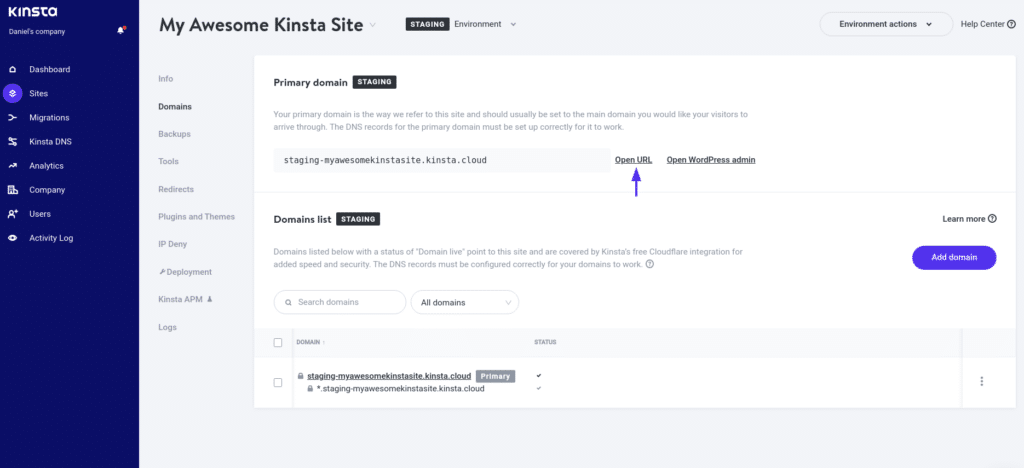
It won’t take more than a couple of seconds for you to enjoy your new staging site. You can visit it by going to your Domains section and then clicking on the Open URL link.
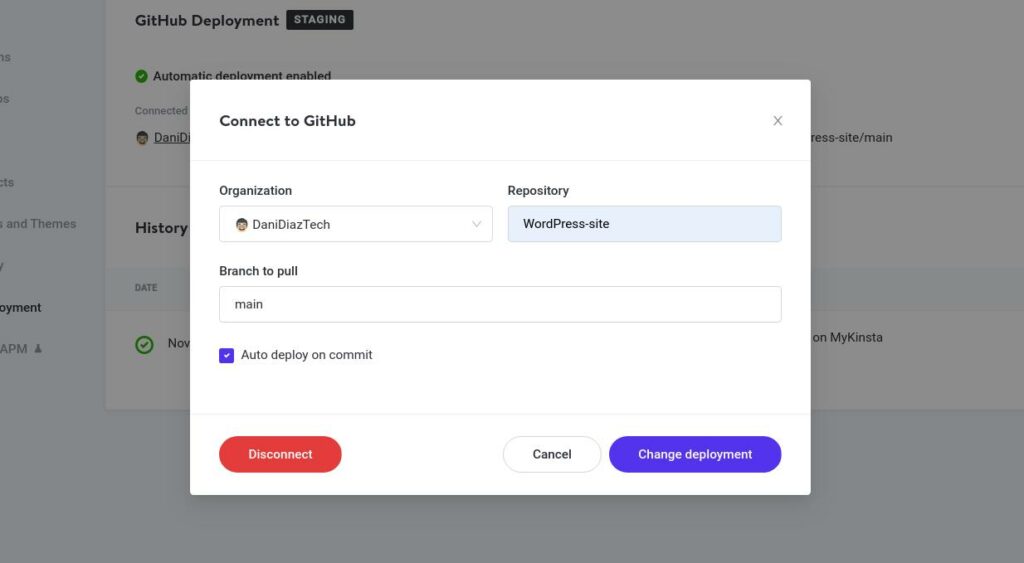
If for some reason you want to disconnect your MyKinsta site from your repo, go to the Change settings option and click on the Disconnect button.
Step 5: Push to Live
Once you’ve carefully tested that everything is working properly, you can push your staging environment to live.
Click on Environmental actions and select the Push to live option.
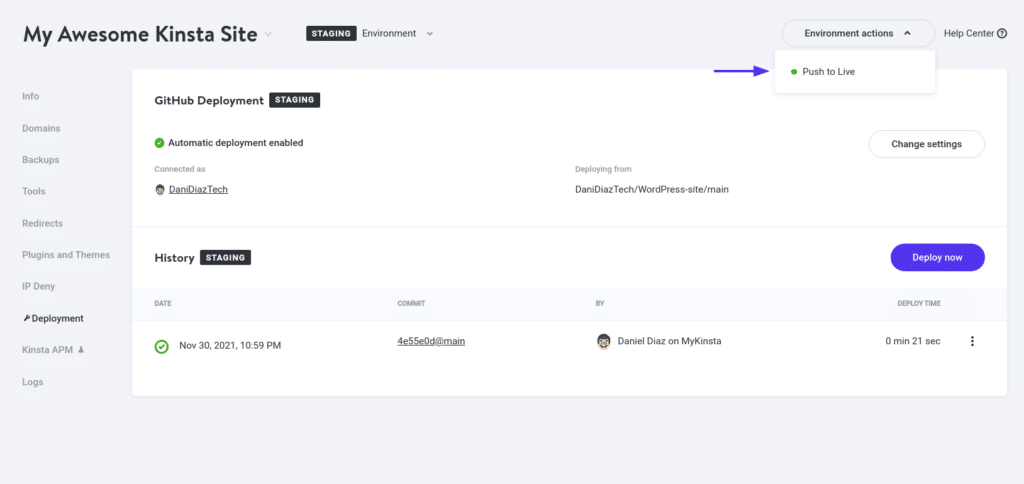
If you’ve made it this far, you should now have a totally functional site deployed from a GitHub repository!
GitHub Deployment Tips
You can take advantage of this feature in several ways, so here are some key tips to use it efficiently:
- Use all the local tools you can’t use in a remote environment like an SSH session. This involves using code editors like VS Code, or a complete development suite like DevKinsta.
- Manage your GitHub project using branches, and only commit changes to main when merging a branch.
- Only activate the auto-deploy option if you follow the second tip.
- Test everything! Don’t let that bug reach the production site.
- Be careful with the files you edit, most of the time you’ll want to make changes inside the wp-content/ folder.
Summary
Git and GitHub are really powerful tools for every developer out there. Now you know how to integrate them with WordPress.
You can use both the SSH method and the new MyKinsta feature: GitHub deployment. Each of them has its own advantages:
- SSH method: Only works with themes and plugins. You manually create a repo, build a theme or plugin and pull it from the server your site is hosted in.
- GitHub Deployment method: This is a new feature for MyKinsta. This is an automated process in which you can focus on building your site locally, Kinsta handles the deployment stuff.
Make sure to evaluate them and create the best WordPress site you can.
If you’re new to WordPress development and felt a little overwhelmed by this guide, worry not. This is not a race, but a marathon, and the first step is to learn the basics of PHP and create lots of exciting projects.
How has integrating WordPress with GitHub affected your site and your development process? Let us know in the comments section!